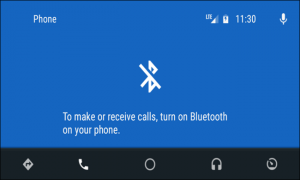
 After checking the cable connection, the next thing you have to do is to make sure that your phone is paired and connected to the head unit of your car. Even though Auto mostly does things using USB – be it playing music, maps and voice commands, and more – it still relies on Bluetooth to make voice calls. So it’s easier to determine if you have Bluetooth issues. All you have to do is to tap the phone button in Auto’s menu, if it tells you to connect your phone to make calls, then your Bluetooth is not connected. To fix that, you’ll have to unplug the phone from USB and then return to your car’s head unit settings menu to pair the device again. For the complete pairing instructions, refer to your car’s or head unit’s manual.
Step 2: Check Android Auto’s Permissions and Notification access.
Starting from this step, the rest of our steps that will follow will apply to both the native phone Auto interface and the car’s head unit. So if you are having problems with either of those, follow the instructions provided below.
If your App permissions are not enabled or have become disabled, this can cause all kinds of issues. That’s why if you are having issues with phone calls, notifications, voice controls and the likes, then you have to follow this step. Take note that our example was done on stock Android, so it may differ depending on your handset’s manufacturer.
After checking the cable connection, the next thing you have to do is to make sure that your phone is paired and connected to the head unit of your car. Even though Auto mostly does things using USB – be it playing music, maps and voice commands, and more – it still relies on Bluetooth to make voice calls. So it’s easier to determine if you have Bluetooth issues. All you have to do is to tap the phone button in Auto’s menu, if it tells you to connect your phone to make calls, then your Bluetooth is not connected. To fix that, you’ll have to unplug the phone from USB and then return to your car’s head unit settings menu to pair the device again. For the complete pairing instructions, refer to your car’s or head unit’s manual.
Step 2: Check Android Auto’s Permissions and Notification access.
Starting from this step, the rest of our steps that will follow will apply to both the native phone Auto interface and the car’s head unit. So if you are having problems with either of those, follow the instructions provided below.
If your App permissions are not enabled or have become disabled, this can cause all kinds of issues. That’s why if you are having issues with phone calls, notifications, voice controls and the likes, then you have to follow this step. Take note that our example was done on stock Android, so it may differ depending on your handset’s manufacturer.
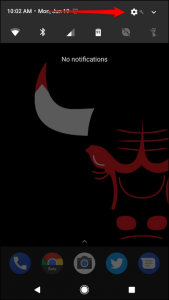
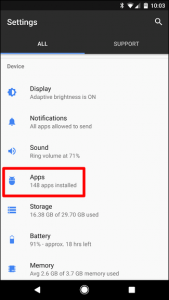
- Swipe down your screen from the top and then tap on the gear icon for Settings to get started in checking app permissions.
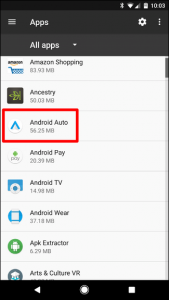
- After opening Settings, navigate to Apps or Applications, depending on your phone.
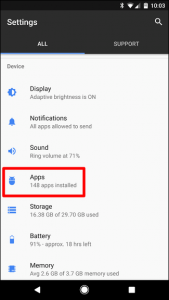
- Under Apps, tap on Android Auto.
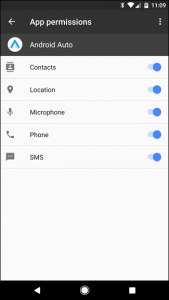
- After that, tap on Permissions.

- After opening Permissions, make sure that everything on the list is enabled. And if there is something disabled, enable it for smoother Auto experience.
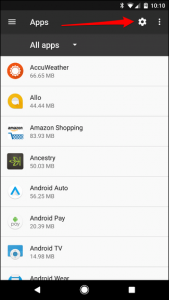
- And if you are also having an issue with notifications not coming through, make sure that the Notification Access is enabled. To do so, go back to the Apps menu. Under Apps, look for the gear icon which is located on the upper-right portion of your screen and then tap it.
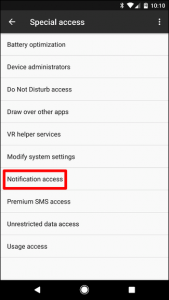
- Go to the bottom part and then tap on Special Access.
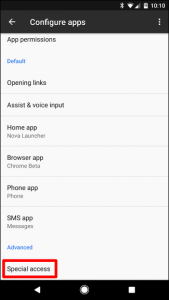
- Tap on the Notification Access.
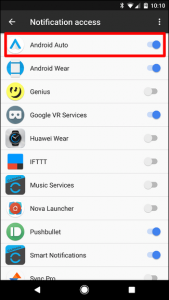
- After opening Notification Access, make sure that Android Auto is enabled.
- Go back to Settings and then go to Apps.

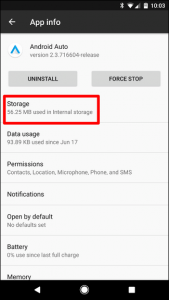
- After opening Apps, look for Android Auto and then tap on it.

- Once opened, tap on Android Auto’s Storage.
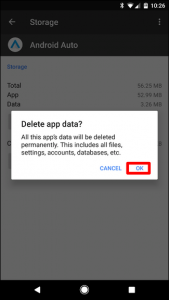
- And then tap on Clear Data. Doing this will erase all your app’s custom settings, so you’ll have to start over when you open the app again.
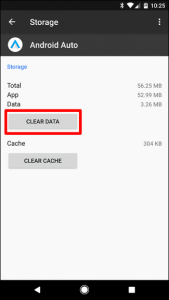
- After tapping Clear Data, a warning will appear to let you know that this will remove all personal settings. Tap on OK to proceed.
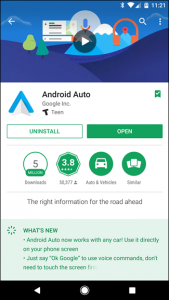
- To get started, go back to Settings and then tap Apps.
- Look for Android Auto and then tap on it.

- Tap the Uninstall button
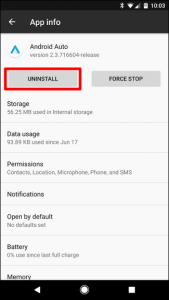 .
.
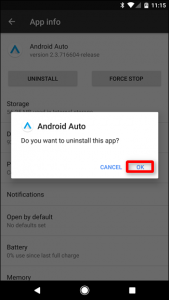
- A pop up will appear to confirm if you want to proceed, tap on OK.
- Wait for the process to finish and then restart your phone.
- After that, go to Google Play Store and re-install Android Auto.