
One of the best ways to control several lights on your Android home screen with just a touch of a button is Philips Hue’s Android widgets. Through this, you now have the option to turn on and off lights or even apply multiple scenes at once. This article will walk you through on just how to create an Android widget for Philips Hue as well as teach you on what you can do with them. To get started, follow our instructions below.
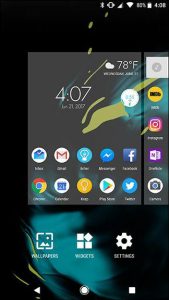
Step 1: Hold down any empty space on your Android home screen and tap Widgets.
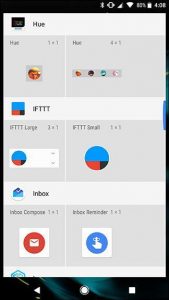
Step 2: Go over the list of widgets and look for Hue. There are two available widgets here; the first one is a single Hue button that you can set to change up to four lights at once, while the second one is an array of four of those buttons. Functionally speaking, there is no difference between adding either a four-button widget and four one-button widgets, so you can choose whatever suits your taste. In this example we used a single button widget.
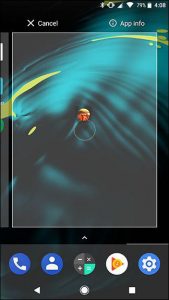
Step 3: Put your widget in any empty space on your home screen.
Step 4: Put a name to your widget. Since this name will appear on your home screen, be sure to keep the name a short and descriptive one.
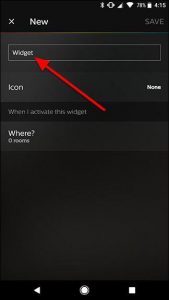
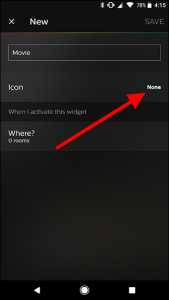
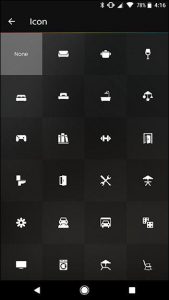
Step 5: This step is optional. You have the option to tap Icon to add a symbol to the front of your widget. However, if you don’t like that, you can just skip this step.
Select from the library of available icons.
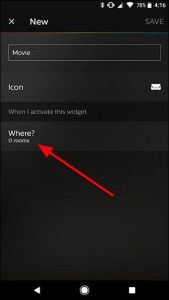
Step 6: After that, tap “Where” under “When I activate this widget”.
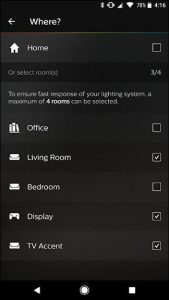
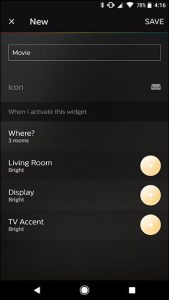
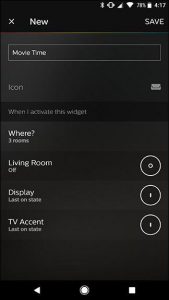
Step 7: Choose up to four rooms that you want to control with your widget on the next screen. In this example, we chose a single widget that will turn off the living room light and turn on the TV accent light and ambient room light with just a single tap. That’s why we chose Living Room, Display and TV Accent. Tap the arrow at the top left corner of your screen, after you’re done selecting your rooms,
Step 8: Now back on the main widget set up screen, you will now see new rows for each light you want to modify. Tap each light to select which scene or action you want to take when you tap the widget.
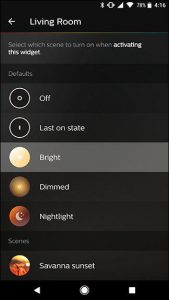
Step 9: You will then see a few special actions at the top of the list. The “Off” special action will turn the light or lights on a room off. The last on state will turn the light on to whatever scene or color you last selected for the chosen room. And then you will see several scenes below that. These presets can modify your lights to various dimming levels or colors, that is, if your bulbs support them. Select the one you want for each room you have chosen earlier.
Step 10: After you selected an action for all the rooms you have selected, tap Save located in the upper-right corner of your screen to save the changes made.
Step 11: After that, you should now be able to see your new Hue widget on your home screen.

And that’s about it. Tap your widget to use it which will change all of the lights you have set up at once.
