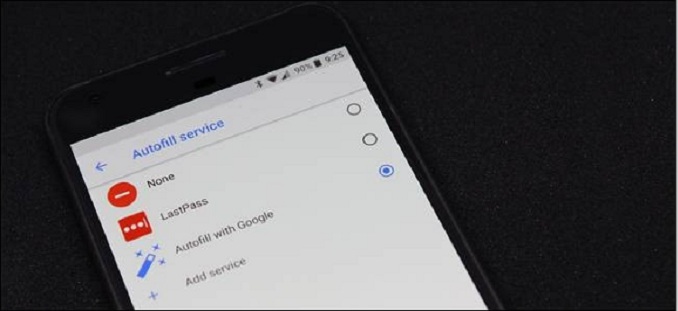
One of the best things about Android Oreo is its system-wide autofill feature. So how does this feature works? The passwords and form data you’ve stored in Chrome will now sync across the entire system making it available for other apps and so on.
Instead of using something like LastPass, if you don’t use Google Chrome’s native password manager, you can actually modify the default autofill manager to your desired application.
Before anything else, take note that this technique requires the app to support the feature by the implementing it with the new APIs. And right now, there really aren’t many options available and even LastPass do not offer it in the stable version of the app so you may have to opt for the public LastPass beta so that you can try it.
If you really want to utilize other password manager, you’ll have to dig around to check if they use the same system. If they don’t, you may have to contact the developer to let them know that you’d like to have this as a part of their app. Or better yet change to another app that could support the newest features.
And now that it’s been cleared out, the next thing you’ll have to do is to set up the default Autofill Manager. Just refer to the instructions given below.
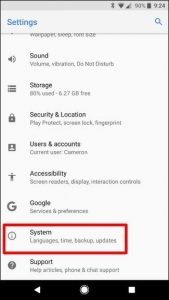
Setting up the default Autofill Manager is pretty much six feet under in the Android OS so you’ll have to be prepared to do some digging. Go to settings by pulling the notification shade down and then tapping the gear icon for settings.

After opening Settings, navigate down and look for “System” option and tap it.
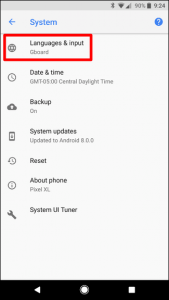
And then tap “Languages & Input” under the System page.
Since there are only a handful of options under the “Languages & Input” page, just tap the “Advanced” option in order to see the rest of it.
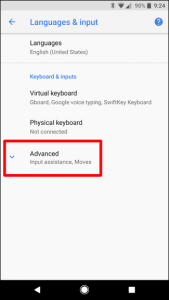
Look for the “Input Assistance” option and then tap “Autofill Service”.
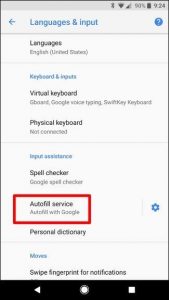
Keep in mind that if you don’t have any capable app installed, your last resort would be is to use the “Autofill with Google”. And if it turns out that you do have capable apps installed, however, they’re still listed here. In the example below, the one that is used is the LastPass public beta which was pointed out earlier and also uses the new Autofill API.

And whenever you choose to use a different service, an alert pops up which asks if you’re sure that you trust the service. And if it is indeed a trusted service then go for it by tapping OK.
Aside from that, there is also a link to add a service that will redirect you to the Play Store and show you a list of compatible apps. However, as of now the list is currently empty. No worries though, for developers will be rolling this out over time.
Moving on, after setting up your Android Autofill Manager, now’s the time to see how this really works. And before you get other ideas, keep in mind that the Autofill Manager only works with apps that supports it. Although the number of apps who support Autofill Manager is only a few, as pointed put earlier, apps will soon be rolling out with this feature over time.
In the example below, the Twitter app is used since it already supports Autofill. So take a closer look to see how the Autofill Manager really works. The first screenshot on the left used Google Autofill while the second one in the right used LastPass Autofill.


As you can see, there’s a big difference between that but they both serve as means to an end. But obviously, LastPass Autofill is quite more useful to that of Google’s. Anyways, it’s only a matter of preference so select whichever Autofill Manager suits you.
