By all accounts, the OnePlus One is a fantastic smartphone. But some people believe a phone isn’t truly fantastic until they root it.
How do you root the OnePlus One? Can you root the OnePlus One?
As you probably guessed from the title of this article, yes you can root the One and today, I’m going to show you exactly how.
Contrary to what some people believe, the OnePlus One does not come pre-rooted. It does, however, run CyanogenMod directly out of the box, which is where a lot of people get confused.
If you’re ready to root, you can follow the steps listed below to efficiently root your OnePlus One.
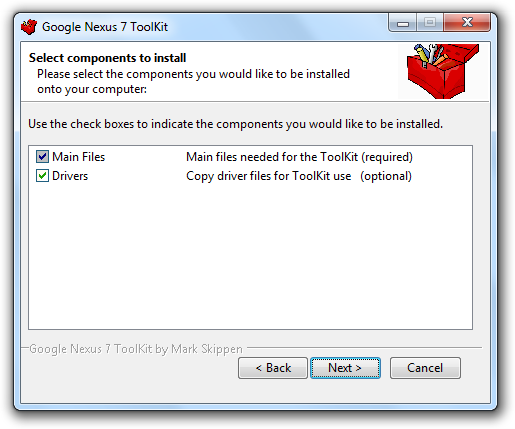
Step 1) Download the Nexus Toolkit here. Obviously, we’re not working with a Nexus, but there are certain files inside this toolkit that will help us with the One.
Step 2) Install the Nexus Toolkit
Step 3) Open your Start menu and type in CMD, then press Enter
Step 4) Navigate to the data folder within the Nexus Toolkit install directory, which can be found at C:\Program Files\WugFresh Development\data.
Step 5) Reboot your OnePlus One into Fastboot mode by powering it off, then holding the volume up and power buttons until the screen turns on. If you see a CyanogenMod “Cid” mascot over top of the words “Fastboot Mode”, then you’ve done everything correctly.
Step 6) Once your phone is in Fastboot mode, connect it to your PC
Step 7) Your phone will be wiped during this next step, although pictures and downloaded files should be kept
Step 8) Type fastboot devices into the command prompt you opened in step 3. After typing in that command, you should see your phone followed by a serial number. If your phone’s name and serial number does not pop up in this step, then you will need to double check Windows Device Manager to make sure your drivers have been correctly installed.
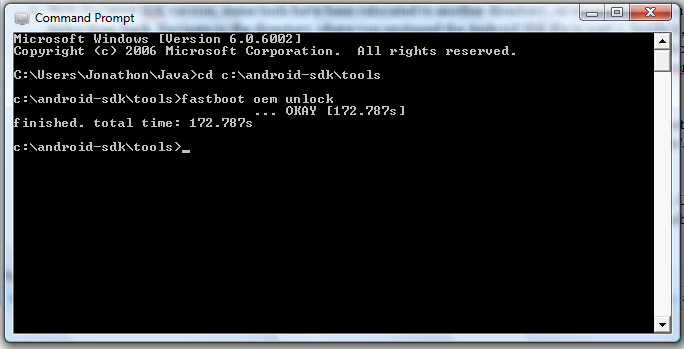
Step 9) Next, type fastboot oem unlock into the command prompt. This unlocks the phone and lets you flash custom recovery files.
 Step 10) Your phone will launch into a setup process like you just took it out of the box for the first time. Complete this setup process.
Step 11) Go into Settings > About Phone and tap on the Build Number 7 times until you receive a notification informing you that developer mode is unlocked.
Step 12) Go back to the main Settings menu and tap Developer Options, then scroll down the screen until you see Android debugging and Advanced Reboot.
Step 13) Next, download the latest version of the TWRP recovery software for the OnePlus One.
Step 14) Drag and drop that file into the same file you used for your fastboot executable
Step 15) Next, download the latest version of SuperSU from here
Step 16) Drag and drop the SuperSU file into any folder on your phone (as long as you can find the file later, it doesn’t really matter where you put it)
Step 17) Reboot into Bootloader by powering down and holding the Volume Down + Power buttons
Step 18) Once in Bootloader, type the following into your command prompt:
fastboot flash recovery openrecovery-twrp-2.7.1.0-bacon.img
If the version/file name of TWRP changed from 2.7.1.0, then change that part of the command, or else this won’t work. If you did this step correctly, you’ll see a success confirmation message in just a few seconds.
Step 19) Type fastboot reboot to return the phone to the OS
Step 20) Restart your phone into Recovery mode by holding down the Power button and tapping “Recovery” on the power options screen.
Step 21) Team Win Recovery window should pop up. Tap Install and choose the SuperSU file you downloaded in Step 15.
Step 22) Slide to install, then tap reboot, system.
Step 23) Once your phone reboots, it will automatically configure a number of processes. Let it complete those processes.
Step 24) Once the OS has completed booting, open your app drawer and open SuperSU. Tap the Settings menu, scroll down, and tap Respect CM root settings.
Step 25) Congratulations! You have just successfully rooted a OnePlus One.

Obviously, this isn’t the simplest rooting process, nor is it the most complicated. It’s somewhere in the middle. But if you want to root your OnePlus One, the steps listed above are currently the best known way to do it.
