A few years ago, I owned a point-and-shoot digital camera. Today, I use nothing but my smartphone to take pictures.
That’s because most smartphone cameras are far more advanced than cheap point-and-shoot cameras. They’re also more convenient.
Photography professionals may laugh at people who take pictures with their smartphone, but hey, I’d rather not lug around a massive DSLR camera on my next backpacking trip.
However, just because you have 13MP in your camera doesn’t mean you can instantly take good pictures. Today, I’m going to share some of the best tips and tricks to make you a better smartphone photographer:
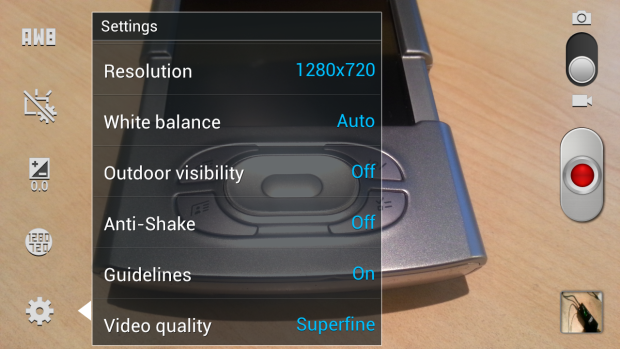
5) Spend a few minutes looking through your phone’s settings menu
This is one of the easiest tips I can teach you about your smartphone camera. Android updates frequently update camera software to add new tools. Check your settings menu regularly and adjust settings according to your needs.

Here are some useful tools you might find in your settings menu:
-Timer
-Burst Shot, where you can take up to 20 pictures in just a few seconds
-“Sound and Shot”, which lets you capture sound alongside each photo
-HDR
-Panorama
-Low Light
-Scene Modes for various conditions, like dawn, sunset, candlelight, party, or landscape
-Metering, ISO, Guidelines, Contrast, etc.
-Anti-Shake
-And more
Familiarize yourself with your settings menu and you’ll be surprised by how versatile your camera can be. It may take a few seconds to setup your camera for certain environments, but the resulting pictures will look fantastic.
4) Learn and love the rule of thirds
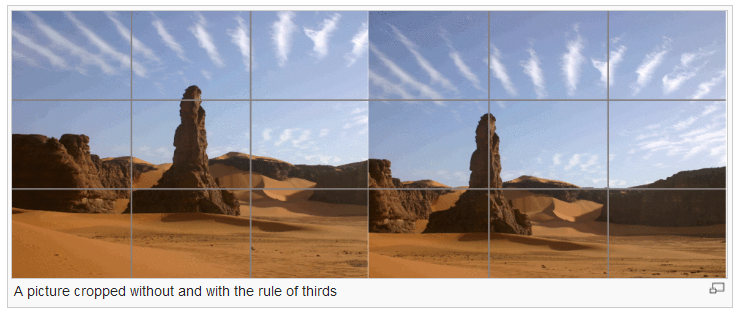
The rule of thirds is one of the most basic rules of photography. Basically, the rule of thirds states that your photo should be separated into 9 equally-sized boxes using two horizontal lines and two vertical lines.
Your subject should be placed along these lines instead of directly centered within the image.

On many cameras, you can actually setup a virtual graph on your screen that divides your frame into 9 windows. Use these windows to apply the rule of thirds over your subject, then take the picture. It’s that easy.
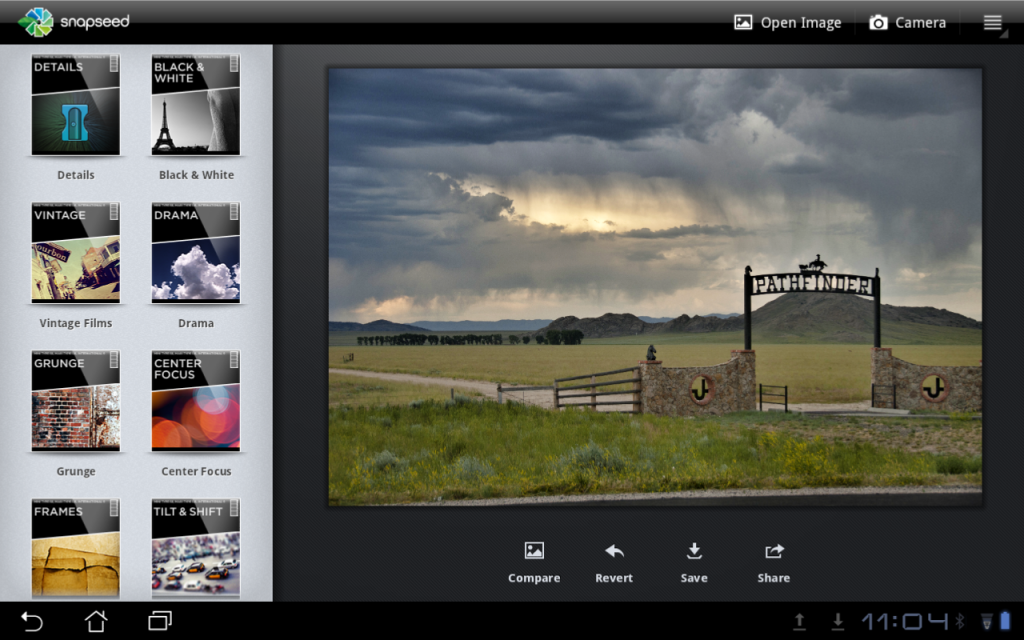
3) Use photo editing software like Snapseed
Let’s say you just met Barack Obama on the streets of Washington, D.C. (unlikely). Your friend took a picture of you and Obama, and then Obama left to find his Secret Service. It’s a once-in-a-lifetime shot and unfortunately, your friend’s photography skills made the picture look blurry, unfocused, and grainy.

Don’t fret! There are plenty of good free photo editing apps available for Android. Those apps include:
All of these apps more or less do the same thing. You can apply filters, crop photos, adjust colors, and even add text or additional information to your pictures. Even if you’ve never touched a photo editing software program before, these apps make you feel like a pro.
2) Avoid zooming
On professional, high-quality cameras, you can use the lens to zoom in on a subject.
Unfortunately, (most) smartphone cameras do not have a zoom function. Instead, they have small, fixed optic lenses. These lenses restrict light from reaching the sensor and cannot be adjusted to zoom in or out on a subject.

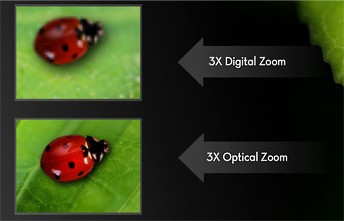
Yes, you can zoom in on your smartphone camera, but you’re digitally zooming. Digital zoom doesn’t enhance the subject – it just fakes the zoom effect.
Instead of zooming in on subjects, a better solution is to take the picture as you normally would, then crop the picture around your subject. This will effectively zoom in on your subject and, in most cases, will look better than using digital zoom.
1) Never shoot a vertical video
Over the past few years, there’s been a great trend on the internet of calling out people who shoot vertical videos. While vertical videos look okay on smartphone screens, they look awful when viewed on other electronic devices or posted to YouTube – massive black bars are seen on both sides of the video.

Next time you take a video, flip your phone to the side. The internet will thank you.
