
If you want a bigger screen for your Android application, well BlueStacks will do it for you. What is BlueStacks? BlueStacks is an application that emulates the Android operating system on PC. Through it, you can run you Android applications on your Windows, Mac desktop or laptop. And the good thing is, it is for free, although it is an ad-supported program, it has a premium subscription that lets you get rid of the annoying ads as well as provide you with technical support when you needed one.
Take note that BlueStack’s current version only runs on Android 4.4.2 KiKat and that some applications may not run on Android’s older versions. And of course, multi-touch using multiple fingers at a time on your computer’s screen won’t work unless you have a monitor that is touch-screen.
Why use BlueStacks?
You might be wondering why you should use BlueStacks to emulate Android instead of the Android Software Development Kit (SDK). Well, the thing is, the Android SDK is a very complicated process and so if you want an easy way to emulate Android, then BlueStacks should be your go-to app since it is essentially a self-contained virtual machine running the Android operating system with the pre-installed Play Store on it as well. So installing and setting BlueStacks up would only take a short amount of time so you should be able to run your applications in PC in no time. Moreover, there are more reasons why you should be using Blue Stacks as listed below.
- Test applications – trying out an application without having to install it from your Android device. Also, you can install apps outside of the Play Store through importing them and installing the .apk files in BlueStacks from your computer.
- Play your favorite games in a bigger screen – if you’re a gamer and you are used to playing them in a bigger screen, then you can play games that is only available to Android on your PC in a wider screen that even lets you to set it into full screen by clicking the Toggle Screen button located in the upper-right corner of the screen. You can press F11 to go back to the normal window size as well.
- Use your computer’s keyboard to type in to your Android applications – this way, you can type notes on your text applications and even in Microsoft Word for Android.
How to use BlueStacks
Step 1: Install BlueStacks
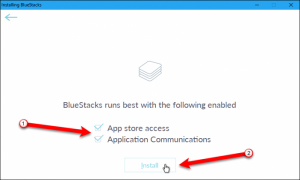
The first thing you have to do to start is to download BlueStack’s installer and run it during which will be a typical installation process. Just use the default settings as you go over the installation wizard. So when the screen below pops up, make sure to check both checkboxes and then click Install.
After that you will be asked to create a BlueStacks account, which is for free and comes with interesting features, using your Google account.
If you are into games, having BlueStacks allows you to chat with other players online who play the same game you do. Aside from that, BLueStacks also has the ability to sync your account among your devices.
In our example in this article, we are using the BlueStacks 2 App Player that is good for running almost all applications, games included. But if you really want a BlueStacks version that is really good for gaming purposes, then you can make use of BlueStacks 3 Gaming Platform which allows you to play different accounts in games. To install BlueStacks, follow the steps below.
- Click the Sign in with Google button and then go over the instructions to set up your BlueStacks account.
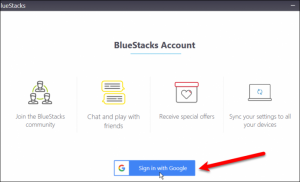
- After you complete setting up your BlueStacks account, BlueStacks will display your Profile name, be sure to remember it and then click Done.

- After clicking Done, a dialog box about improving your location accuracy pops up, Click Agree if you want to improve it.
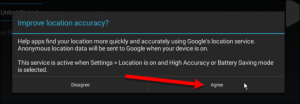
- Another dialog box appears that prompts you to turn location on for all your Google apps, click Yes if you want to.

Step 2: Set up Android in BlueStacks
Once you finished setting up your BlueStacks account, all you have to now is to set Android on it. Doing this is like setting up a new device. Follow the instructions below to set up Android in BlueStacks.
- Choose language on the Welcome screen.
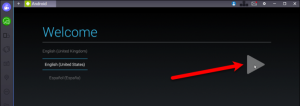
- Sign in to your Google account. Take note that when you sign in to your Google account in BlueStacks, you will get two security alerts from Google notifying you that your just signed in from the two devices you are using for BlueStacks. There is nothing to worry about these alerts and just continue with the process.
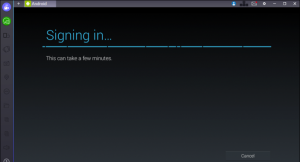
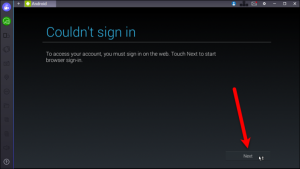
- You might encounter an error when signing in of you had set up two-factor authentication on your Google account which is recommended by the way. To fix that, click Next to start sign in on a browser.
- After that, you will get a notification to approve the attempted sign n on your Android device. Tap yes to approve it.
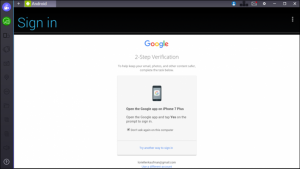
And that’s about it. Once you complete setting up Android on your BlueStacks, you should now be able to run Android apps on it.
