Many Android users have been in a situation where they need to quickly transfer files from their Windows PC to their Android.
What’s the best way to swap files between the platforms?
Obviously, there are apps like AirDroid that let you transfer data over a network connection. However, these apps are web-based: they won’t let you actually map your Android device to your Windows computer and have it appear as a normal drive. They just let you move files to your Android using a web-based interface.
If you want a better solution, then One Click Root is here to help. Here’s how to easily access Android files from your Windows PC.
Download ES File Explorer
ES File Explorer is arguably the most popular file explorer app for Android. Although it started as a basic file explorer, it’s since turned into one of the most useful Android applications you’ll find.
You can download the app for free here.
Install the app and launch it then move onto the next step.
Setup Remote Manager
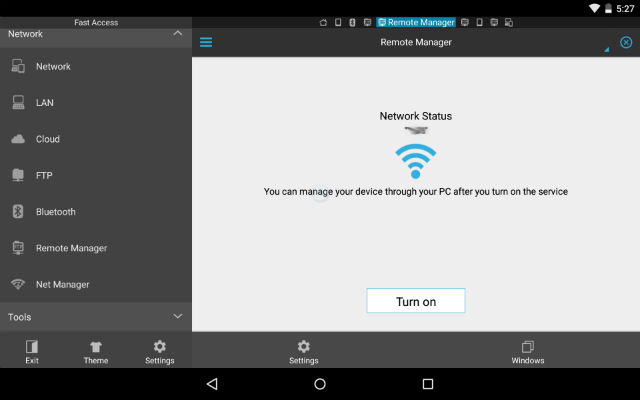
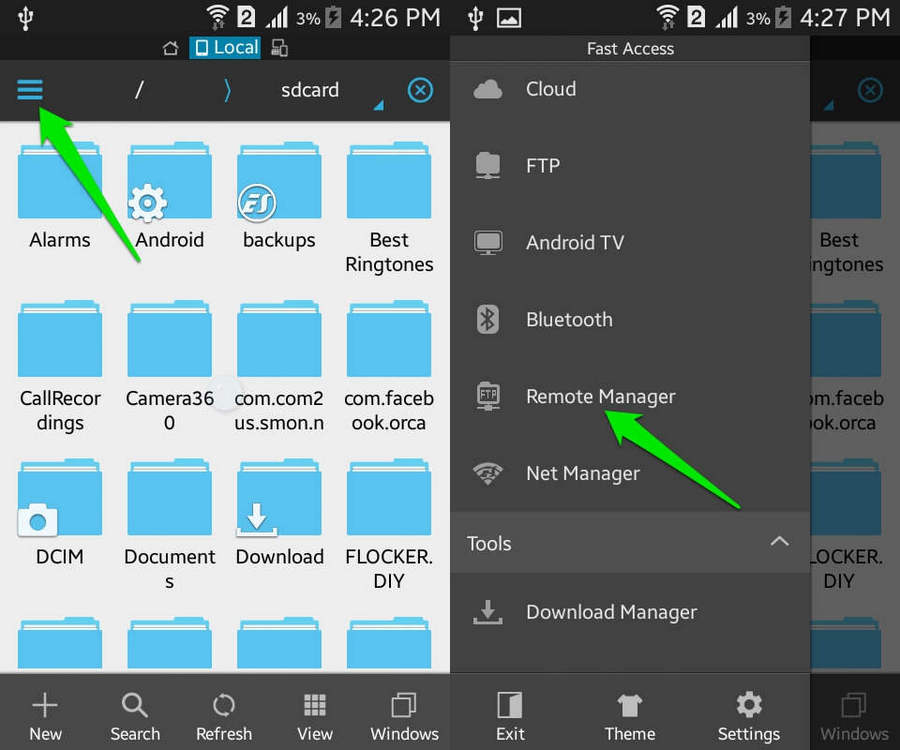
The feature we’re looking for is called Remote Manager. That feature can be found by swiping from the left side of the screen. Look down the list until you see Remote Manager. Tap that menu.
After opening Remote Manager, you’ll need to configure it by tapping the Settings icon (the gear logo on the top menu).
This will open the Remote Manager settings window. You’ll see that ES File Explorer automatically sets the default port and current user to anonymous.
Customizing your Settings
If you’re on a LAN with other users, then you should setup a username and password. If you’re on your own LAN, then you probably don’t need to worry about it. You can set your own username and password by tapping Set Manage Account.
You may also want to change the current port to a number that’s easy to remember. You can change the port to anything between 1025 and 65534. Change it to your birth year or 9999 or something you won’t forget.
You can also change your root directory. If you want to access your entire phone, then just select “/”. Some people, however, may just want to access their external storage SD card, in which case you can select it from the menu.
Once you’re finished the setup process, go back to the main screen and tap the Turn On button, which activates the FTP (file transfer protocol) server. Once the FTP is activated, ES File Explorer will display the FTP address you need.
Mapping the Drive to Windows
On Windows, open your Windows File Explorer and click the option Map Network Drive (it’s under the Computer tab).
Click on the link “Connect to a Web site…” to map your Android device.
You’ll see the Network Location Wizard pop up. Click Next to continue, then double click on Choose a custom network location.
This is where you enter the FTP address displayed on the ES File Explorer app. Enter it exactly as shown in the app.
Uncheck the Log in anonymously checkbox if you setup a username and password, or leave it unchecked if you left the anonymous option on.
Name your drive something like “My Galaxy S7” or whatever you like, then click Finish.
That’s it! Your Android has officially been mapped to your Windows PC and will appear in Windows File Explorer under Network Locations. Double click on it to open it at any time. The first time you open it, Windows will ask for the FTP password. You can click the Save password option to avoid entering it again.
Create a Shortcut on your Android Device
To make the transfer process even easier, I recommend creating a shortcut on your Android homescreen. Navigate to Remote Manager settings and tap on the option “Create Shortcut”. ES Explorer will create a shortcut on your homescreen. Open that any time you want to transfer files to and from your Windows PC.

